A “Kleki dog” is a dog drawing made in Kleki, the free browser-based painting app at kleki.com — it is not a dog breed. No kennel club recognises a “Kleki”, and the phrase only shows up in search because people want to know how to draw a dog using Kleki’s brushes and layers, or want to see examples of dog art made in it. This guide answers both halves: what Kleki is in its 2026 form, and a step-by-step method for drawing a convincing dog in it, from first sketch to exported file.
The app has changed a great deal since most “how to draw in Kleki” tutorials were written. It now has a select tool, a warp transform, automatic tab recovery and a WebGL filter set, none of which existed in the version those tutorials describe. Everything below reflects the build running today, including the exact shortcuts, the exact layer ceiling and the exact export options, so you are not fighting a guide written for software that no longer matches what is on your screen.
What Kleki Actually Is
Kleki is a painting application that runs entirely inside a web browser. There is no download, no account and no paywall: you open the page and the canvas is already there. It is built by the German developer known as bitbof, and the engine behind it is released as open source under the MIT licence on GitHub under the name Klecks, so the code can be read, forked or self-hosted by anyone.
It is deliberately stripped back compared with Photoshop or Clip Studio Paint, but it is no longer the bare sketchpad people remember. The current build carries six named brushes, a full tool row, sixteen layers with blend modes, a WebGL-accelerated filter set, and interface translations in more than ten languages, with Brazilian Portuguese, Swedish, Latvian, Finnish and Dutch all added during 2025.
| Feature | What you get in Kleki (2026 build) | Why it matters for dog art |
| Cost | Free, no sign-up, no watermark, open source (MIT) | Nothing stops a beginner starting today |
| Brushes | Six: pen, blend, sketchy, pixel, chemy, smudge, plus a dedicated eraser | Sketchy for fur texture, pen for clean outlines, blend and smudge for soft muzzles |
| Layers | 16 maximum, with blend modes including multiply, screen and overlay | Sketch, lines, flats, shadow and highlight all stay separate with room to spare |
| Other tools | Paint bucket, gradient, text, shape, select and transform | Fill a coat instantly, add a caption, straighten a crooked head |
| Filters | Blur, tilt-shift, hue and saturation, curves, sharpen, distort, noise, lineart extraction | Throw a background out of focus; pull clean lines out of a scanned pencil sketch |
| Pressure support | Pressure-sensitive size and opacity with stroke stabilisation | Tapering strokes read as fur rather than as flat marks |
| Import | JPEG, PNG, PSD (with limitations), SVG, WEBP, BMP, GIF — drag onto the canvas | Trace or colour-match from almost any reference file |
| Export | PNG, layered PSD, or every layer as a separate PNG | PSD keeps layers for finishing elsewhere; separate PNGs suit compositing |
| Platform | Any modern browser on Windows, macOS, Linux, Android or iPad | No install on locked-down school or library machines |
The trade-offs are real and worth knowing before you commit an evening to a piece. Sixteen layers sounds generous until you start putting each marking on its own layer, so plan to merge finished stages as you go. There is no vector layer, no animation timeline and no advanced masking in the public build. Kleki’s tab recovery, added in 2025, will usually bring your canvas back after an accidental refresh, but the project is explicit that it is not a full auto-save system: recoveries are kept only for a short window and capped at 1 GB in total. Export a PNG every twenty minutes and the point becomes moot.
What Changed in Kleki During 2025 and 2026
If you last used Kleki a couple of years ago, four changes matter for animal drawing specifically.
- The select tool (2024) and its transform. You can now lasso a badly placed ear, muzzle or leg and move, scale or rotate it rather than erasing and redrawing. Through August 2025 the selection was progressively wired into the rest of the app, so by the end of that year every painting tool and edit function respected the active selection instead of ignoring it.
- Warp transform, released 13 March 2026. Announced on the official Kleki blog, this adds a mesh-style deformation inside the select tool. For dogs it is the single most useful addition in years: a muzzle that is a few degrees off, a back that sags, an ear set slightly too low can all be nudged into place without touching the line work.
- Automatic tab recovery (2025). Close the tab by accident and the drawing is usually waiting when you return.
- A rebuilt undo and redo system (2025), alongside a scatter parameter for the pen brush and 46 bug fixes logged over the year. The scatter setting is quietly excellent for fur: it breaks a stroke into offset dabs rather than a solid ribbon.
One piece of 2026 housekeeping is worth a line because it explains occasional slow loads earlier in the year: in March 2026 Kleki moved its hosting from Netlify to bunny.net after Netlify’s new pricing would have taken the project’s bill from $20 to $234. The app itself did not change; only where it is served from did.
Setting Up the Canvas Before You Draw Anything
Five minutes of setup prevents most of the frustration beginners hit halfway through a drawing.
- Pick a canvas size you can zoom into. Roughly 2000 x 1500 pixels gives you room to work on an eye at 200% without the strokes turning to mush. Anything under about 1000 pixels wide will look soft the moment you share it.
- Set a mid-grey background layer. Drawing on pure white makes every value you choose look darker than it is. A neutral grey underneath your sketch keeps your light and shadow judgements honest. Press Enter to flood the active layer with the current colour rather than dragging the bucket across it.
- Open a reference photo in a second tab, or drag it straight in. Kleki imports JPEG, PNG, WEBP, BMP, GIF, SVG and PSD, so almost anything you have will land on the canvas. Working from a photograph is not cheating; dogs have specific skull structures that are close to impossible to invent convincingly.
- Learn the two bracket keys. [ shrinks the brush and ] grows it. Changing size without hunting through a menu is the single biggest speed gain available to you.
The Shortcuts Worth Memorising
Several widely copied Kleki tutorials list the redo shortcut incorrectly as Ctrl+Shift+Z. In Kleki it is Ctrl+Y. The full set that matters for drawing:
| Action | Shortcut | When you will use it |
| Undo / redo | Ctrl+Z / Ctrl+Y | Constantly — note the redo key, it is not Ctrl+Shift+Z |
| Brush size down / up | [ and ] | Every few strokes once you stop using the slider |
| Eyedropper | Right mouse button, or hold Alt | Sampling coat colour from a reference |
| Pan the canvas | Space + drag, middle mouse button, or arrow keys | Working zoomed in on an eye or a paw |
| Rotate the view | R + drag (hold Shift to snap); R + Up-Arrow resets | Turning the canvas to draw a comfortable fur stroke direction |
| Fit into view / reset view | Home / End | Checking the whole drawing after detail work |
| Swap foreground and background colour | X | Flipping between shadow and highlight tones |
| Clear layer / fill layer | Delete or Backspace / Enter | Restarting a stage, or laying a flat base |
| Straight line | Hold Shift while drawing | Lead, collar edge, skirting board |
| Tools | B brush, E eraser, G bucket or gradient, T text, U shape, L select | Switching without leaving the canvas |
| Save image / save to browser storage | Ctrl+S / Ctrl+Shift+S | Every twenty minutes, without fail |
How to Draw a Dog in Kleki, Step by Step
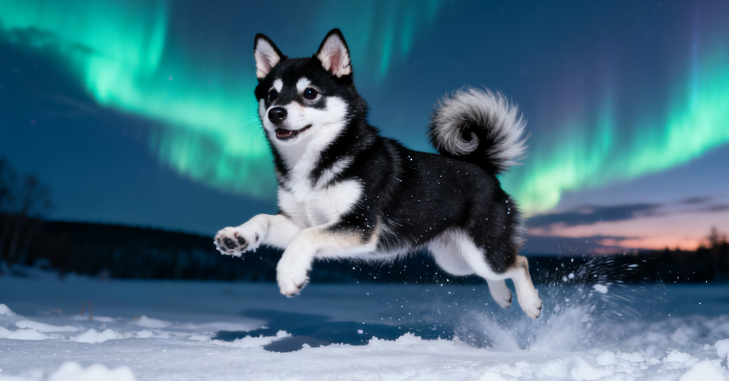
Step 1: Block the Big Shapes
On a new layer set to about 40% opacity, draw the dog as three simple forms: a circle for the cranium, a smaller box or wedge for the muzzle, and an oval or bean for the ribcage. Do not draw a single hair yet. Almost every unconvincing dog drawing fails at this stage, because the muzzle was attached at the wrong angle and no amount of fur texture later can fix it.
Use the head length as your unit of measurement. Most medium breeds stand roughly three to three and a half head-lengths tall at the shoulder, and the chest sits about halfway between the ground and the top of the back. Check your reference against that rule of thumb and adjust before continuing. This is the stage where the select tool earns its place: if the ribcage is clearly too far back, lasso it with L and drag it rather than erasing.
Step 2: Place the Features on Construction Lines
Draw a centre line down the face and a horizontal eye line across it, both curving with the direction the head is turned. Eyes sit on that line, roughly one eye-width apart, and the nose sits on the centre line at the end of the muzzle. Getting these three marks in the right place does more for likeness than every subsequent step combined.
A useful check: on most dogs the outer corner of the eye, the base of the ear and the corner of the mouth fall close to a single shallow arc. If your drawing looks subtly wrong but you cannot name why, test that arc.
Step 3: Refine the Sketch
Drop the opacity of your block-in layer to about 20%, add a new layer above it, and draw a tighter sketch on top with the sketchy brush. This is where breed character appears: the stop (the step between the muzzle and the forehead), the ear set, the depth of the chest, the angle of the hocks. Work loosely and keep erasing.
If the whole head is right but slightly distorted, reach for warp transform rather than starting again. Select the head, apply the warp, and push the mesh until the proportions settle. It is far faster than redrawing and it keeps the stroke quality you already liked.
Step 4: Line Work
Hide the sketch layers, add a new layer and commit to clean lines with the pen brush. Vary the weight deliberately: heavier lines under the belly, along the jaw and where the legs meet the body, lighter lines across the top of the back and inside the ears. Uniform-width outlines are the fastest way to make a drawing look flat.
Break your line at the edges of fluffy areas rather than drawing a continuous contour. A ruff, a feathered tail and a shaggy hind leg all read better as clusters of short, directional strokes. If your hand shakes, raise the pen brush’s stabilisation before you start — it smooths the stroke as you draw rather than after.
Step 5: Flat Colour
Underneath the line layer, add a colour layer and fill the whole silhouette with a single mid-tone. Press G for the paint bucket for the large area, then clean up the edges by hand at high zoom. Add the markings — a blaze, a saddle, tan points, white socks — on a layer above it so you can adjust them independently.
A practical colour note: dog coats are rarely the colour people assume. A “black” Labrador is a very dark desaturated brown-blue in most daylight; a “white” West Highland Terrier is a warm cream in the light and a cool violet-grey in the shade. Hold Alt and sample colours straight from your reference and you will get results that look photographic rather than cartoonish.
Step 6: Shading and Light
Add a layer above the flats, set it to multiply for shadow, and a separate layer on screen or overlay for highlights. Kleki’s sixteen-layer ceiling is comfortable here as long as you have merged your block-in stages. Decide where your light is coming from and stay consistent. Shadow on a dog classically falls under the jaw, inside the ears, beneath the chest, behind the front legs and along the underside of the tail.
Use the blend brush at low opacity where the form is soft — the bridge of the nose, the cheek, the flank — and the pen brush where the shadow has a crisp edge, such as under a collar or where an ear casts onto the skull. The smudge brush is a different animal from blend: it drags existing pigment rather than averaging it, which suits the wispy edge of a ruff.
Step 7: Fur Texture and Detail
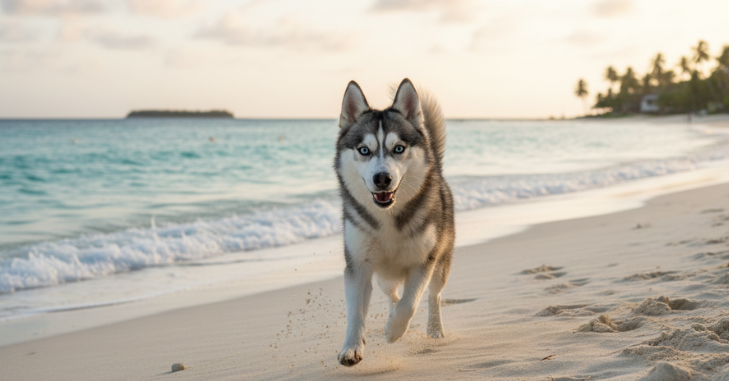
Fur is the last thing you add, not the first. Work with short, curved, directional strokes that follow the way the coat actually grows: outward from the crown of the head, backwards along the spine, downwards on the flanks, and in a swirl at the chest. Do not texture the whole animal — pick two or three areas nearest the viewer, detail those, and leave the rest suggested.
This is where the pen brush’s scatter parameter, added in 2025, does the heavy lifting. Raising scatter breaks a single stroke into offset dabs, so one drag lays down a cluster of separate hairs instead of a ribbon. Set it moderately high, size small, opacity around 40%, and build the coat in passes rather than trying to place hairs one at a time.
Finish with the small marks that sell an animal portrait: a bright specular dot in each eye placed on the same side as your light source, a slightly damp sheen on the nose leather, a few individual whiskers drawn as single tapering strokes, and the faint pink of skin showing through thin fur inside the ears.
Step 8: Finish With a Filter, Sparingly
Kleki’s WebGL filters are fast enough to use casually, which is exactly the danger. Two are genuinely useful on an animal portrait. A gentle blur or tilt-shift on the background layer pushes the dog forward and mimics a wide aperture. A small curves adjustment on a merged copy at the very end lifts the contrast that digital painting tends to flatten. Hue and saturation is best used on a single marking layer rather than the whole image, to test whether a tan point wants to be warmer.
If you prefer working on paper first, the lineart extraction filter is the reason to scan rather than photograph: it pulls clean black lines out of a pencil drawing on white, giving you a line layer to colour underneath without tracing.
Matching the Drawing to a Real Breed
If you want your drawing to be recognisably a particular dog rather than a generic one, the differences are structural rather than decorative. This table covers the shapes that matter most.
| Breed | Head shape | Ears | Coat to draw | Brush to reach for |
| Labrador Retriever | Broad skull, clear stop, medium muzzle | Set well back, hanging close | Short and dense; almost no visible strands | Blend, with pen only at the silhouette |
| Border Collie | Moderate wedge, pronounced stop | Semi-erect, often one up one tipped | Long ruff and feathering; heavy directional strokes | Sketchy, high scatter |
| Greyhound | Long and narrow, barely any stop | Small, folded back rose ears | Very short; skin and muscle read through | Blend and smudge; almost no texture |
| Cocker Spaniel | Rounded skull, square muzzle | Long, low-set, heavily feathered | Silky, wavy; long strokes on ears and legs | Pen, long tapering strokes |
| German Shepherd | Wedge-shaped, strong muzzle | Large, erect, pointed | Double coat; dense ruff, black saddle marking | Sketchy for the ruff, bucket for the saddle |
| Pug | Round, flat face, deep wrinkles | Small, folded button or rose | Very short; wrinkles carry the shading | Blend on a multiply layer |
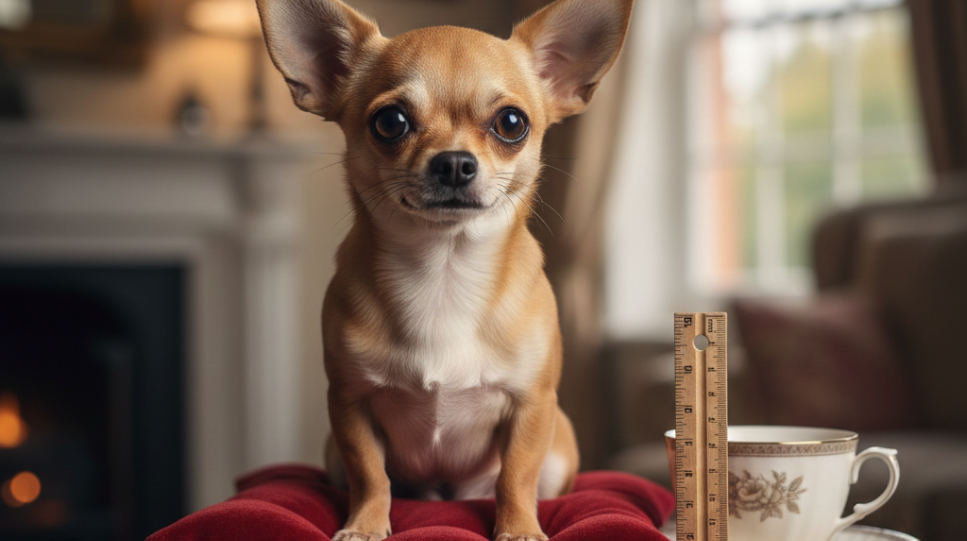
| Chihuahua | Apple-domed skull, short muzzle | Very large, erect, flaring outwards | Smooth or long; huge eyes dominate the face | Pen for the eyes, blend for the rest |
Small breeds are harder than they look precisely because the eyes take up so much of the face that a millimetre of error is visible. If you are drawing one of the toy breeds, it is worth reading up on how their skulls actually differ before you start; our guide to the smallest dog breed in the world sets out the proportions that separate a Chihuahua from a Yorkshire Terrier from a Pomeranian.
Tails deserve a separate thought. A docked tail changes a dog’s whole rear silhouette and the balance of the pose, and docking is now banned for cosmetic reasons across the UK, so a working spaniel drawn with a stump and a show spaniel drawn with a full tail are both defensible depending on the dog. Our explainer on the rules and reality of docked tails covers which breeds you will still see with one.
Adding Props and a Setting
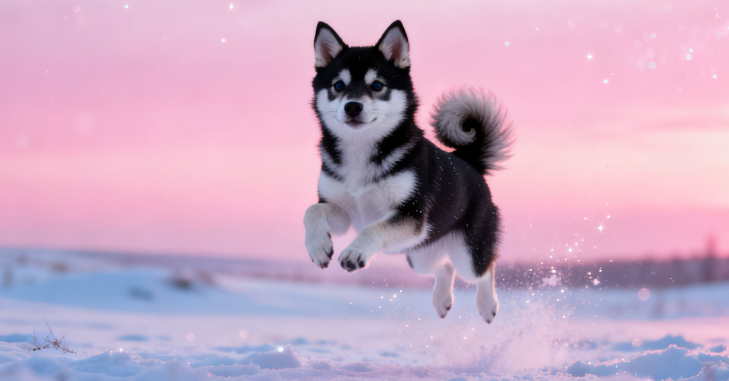
A dog floating on a blank background looks unfinished. You do not need a full environment — one or two objects and a shadow are enough. A food bowl, a lead, a tennis ball, a folded blanket or a stretch of skirting board all give the eye something to measure the animal against, and they are far easier to draw than the dog itself.
The single most effective addition is a contact shadow: a soft dark shape directly beneath the paws, darkest where they touch the ground and fading outwards. Without it, the animal appears to hover. Add it on its own layer at low opacity so you can adjust the strength afterwards.
The shape tool (U) is the shortcut here. A bowl is an ellipse plus a shallower ellipse; a ball is a circle with one highlight; a doorway is a rectangle. Draw them as shapes, then break the edges slightly with the eraser so they do not look pasted in. Water scenes are a popular follow-on subject, and if you are drawing a dog mid-swim it helps to know which breeds actually take to it — not all of them do, as our piece on whether all dogs can swim explains.
Drawing on a Phone or Tablet
Kleki works properly on touchscreens, which makes it one of the few genuinely free options for drawing on a device you already own. The mobile interface was reworked during 2025, with the eyedropper, colour selection and tool switcher all rebuilt for touch. Learn the gestures and the experience changes completely:
- Two fingers do everything navigational. Drag to pan, pinch to zoom, twist to rotate the canvas — all in one gesture, without leaving the brush.
- Two-finger tap undoes. Three-finger tap redoes. This is the single most useful thing to know on a tablet and it is not obvious from the interface.
- Double-tap fits the drawing into view. Faster than pinching back out when you have been working at 300%.
- Zoom in more than feels necessary. Fingertips are blunt instruments; working at 200–300% and panning frequently produces far cleaner lines than trying to draw the whole canvas at once.
- Use a stylus if you have one. Even a basic rubber-tipped capacitive stylus improves control noticeably over a finger, and an active stylus with pressure support changes the experience entirely, since Kleki maps pressure to both size and opacity.
- Rotate to landscape and hide the browser chrome. Adding the page to your home screen or using full-screen mode reclaims a surprising amount of canvas.
Common Mistakes and How to Fix Them
- Eyes too high on the head. On most dogs the eyes sit closer to the middle of the skull than beginners expect. If the drawing looks oddly human, this is usually why.
- Texturing before the form is solid. Fur drawn over a badly constructed head just makes the error hairier. Fix the shapes first, using select and warp if you need to.
- Every stroke at 100% opacity. Working at 30–50% and building up gives you soft transitions and the ability to correct as you go.
- One flat outline weight. Vary the line and the drawing gains depth immediately.
- Muddy colour from over-blending. The blend brush is powerful; used everywhere it turns a portrait to porridge. Blend selectively and leave crisp edges where the form turns sharply.
- Burning all sixteen layers early. Merge finished stages as you go. Hitting the ceiling mid-drawing forces merges you have not thought about.
- Trusting tab recovery as a save. It is a safety net for a crash, not a backup. Ctrl+S regularly.
- Painting outside an active selection and wondering why nothing appears. Since 2025 every tool respects the selection. If a brush suddenly does nothing, you almost certainly have a selection still live somewhere off-screen.
Saving, Exporting and Sharing Your Work
Kleki offers three export routes, and picking the right one saves rework. PNG gives you a single flattened image for posting or printing. PSD keeps every layer, so the file opens in Photoshop, Krita, GIMP or Photopea with the sketch, lines, flats and shading still separate. The third option exports each layer as its own PNG, which is the one to choose if you are compositing the dog into a photograph or animating it elsewhere.
Ctrl+S triggers the image save; Ctrl+Shift+S writes to browser storage instead. The two are not interchangeable. Browser storage lives on the device you are using, and clearing site data, switching machine or working in a private window will lose it. The project says so plainly, and caps stored recoveries at 1 GB with no long-term guarantee.
For printing, a 2000-pixel-wide file prints cleanly at about A5 at 300 dpi and starts to soften much beyond A4. If you know from the outset that you want a print, start larger — the cost of a bigger canvas is only performance, and Kleki handles 3000 pixels comfortably on a mid-range laptop.
Kleki Compared With Other Free Options
| Tool | Install needed | Layers | Best for | Main limitation |
| Kleki | No — browser only | 16 | Quick sketches and single-subject portraits | Layer ceiling, no masking or animation |
| Krita | Yes, desktop | Effectively unlimited | Full illustration and painting work | Steeper learning curve, heavier on hardware |
| Photopea | No — browser only | Effectively unlimited | Photo editing and layered PSD work | Brush engine less pleasant for painting; ad-supported |
| Autodesk Sketchbook | Yes, desktop and mobile | Generous | Clean line work and concept sketching | Fewer texture and blending options |
| Ibis Paint X | Yes, mobile | Tier-dependent | Mobile illustration with large brush libraries | Advertising-supported free tier |
| Excalidraw / Canva drawing | No — browser only | N/A | Diagrams and flat graphics | Not a painting engine at all |
The honest summary: Kleki will not replace a full desktop painting application for a professional commission, and the sixteen-layer ceiling is the hard wall you will eventually hit. But for learning animal anatomy, sketching daily, or drawing on a machine where you cannot install software, it removes every barrier between you and the canvas, and the 2025–2026 additions closed most of the gaps that used to send people elsewhere.
Is There a Dog Breed Called a Kleki?
No. Searching the registers of the UK Kennel Club, the Fédération Cynologique Internationale and the American Kennel Club turns up nothing, and no breed society, veterinary body or scientific literature describes such an animal. Several websites publish confident-looking profiles giving a “Kleki dog” a Central European origin, a 20–35 lb weight range and a 12–15 year lifespan; those figures are generic filler applied to a name that does not correspond to any real dog. The numbers vary from page to page, which is itself the tell — a real breed standard does not change depending on which site you read.
This matters practically. If you are researching a dog to bring home, use recognised breed standards, speak to a vet, and buy only from a breeder who health-tests and lets you see the puppy with its mother. Invented breed profiles cannot tell you anything about temperament, exercise needs or inherited health risk, because there is no population of dogs behind them. If the drawing you are about to make is of a dog you hope to own, pick a real breed and research it properly.
Frequently Asked Questions
Is Kleki free to use?
Yes. Kleki is free, runs in a browser, requires no account or download, and does not watermark your exported images. There is no premium tier gating the brushes or the export function. The engine behind it, Klecks, is open source under the MIT licence, and the project is funded by voluntary supporter donations.
How many layers can you have in Kleki?
Sixteen. Each layer has adjustable opacity and blend modes including multiply, screen and overlay. For a dog portrait a workable split is block-in, refined sketch, line work, flat colour, markings, shadow, highlight and background, which leaves eight layers spare for detail passes.
Do I need a graphics tablet to draw a dog in Kleki?
No. A mouse works for line-based drawings, and a touchscreen works well if you zoom in and learn the gestures. A pressure-sensitive tablet or stylus makes tapering fur strokes far easier, because Kleki maps pressure to both brush size and opacity, and it is the single upgrade that improves results most. It is not a requirement to start.
What are the six Kleki brushes and which suits fur?
Pen, blend, sketchy, pixel, chemy and smudge, plus a separate eraser. For fur, the sketchy brush and the pen brush with its scatter parameter raised are the two to use; blend and smudge soften a muzzle or a short coat, and pixel and chemy are better suited to stylised or graphic work than to realistic animals.
What is the redo shortcut in Kleki?
Ctrl+Y, not Ctrl+Shift+Z. Undo is Ctrl+Z. Several older tutorials list the Photoshop-style redo, which does nothing in Kleki. On a touchscreen, a two-finger tap undoes and a three-finger tap redoes.
Can I save a Kleki drawing and finish it in another program?
Yes. Export as a PSD and your layers stay intact, so the file opens in Photoshop, Krita, GIMP or Photopea with everything still separate. You can also export every layer as an individual PNG, which suits compositing. Export as a single PNG when you only need a flat finished image.
Will my work still be there if I close the tab?
Usually. Kleki added automatic tab recovery in 2025, so a refresh or an accidental tab close normally restores the canvas. The project is clear that this is not a full auto-save: recoveries are held only briefly, capped at 1 GB in total, and do not survive clearing site data, switching device or using a private window. Save a copy with Ctrl+S regularly.
Is the Kleki dog a real breed of dog?
No. There is no recognised breed called a Kleki at the UK Kennel Club, the FCI or the AKC. The phrase refers to dog artwork created in the Kleki drawing app, and any page presenting it as a breed with an origin story, weight range and lifespan is presenting invented information.
Fancy something different from our animal coverage? Read our guide to whether declawing cats is bad for the UK position on a procedure many owners still ask about.